A flash drive can be formatted, but there is some information that is retained in the process. This information can be various things; it could be an unwanted Master Boot Record; it could be an unwanted partitioning of the disk causing it to appear smaller than it actually is. If a format won’t fix a problem then “cleaning” the disk will most likely fix the problem. This information is also applicable to external hard drives and SD cards.
Step 1
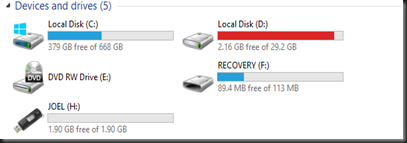
Connect the flash drive to the computer and open Explorer to “Computer” (Windows Vista and 7) or “This PC” (Windows 8 and 8.1). Look at the drive letter and name (“JOEL (H:)” in my example). Remember this so you don’t accidentally erase a different disk!
Step 2
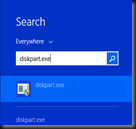
Open the Start Screen (Windows 8 and 8.1) or the Start Menu (Windows Vista and 7). Type “diskpart.exe” and push enter. If the User Account Control asks you if you want to do this then select “Yes”.
Step 3
Type “list volume”.
Step 4
In the list find the Volume that matches the drive name and letter that you found in Step 1. Type “select volume #”, but replace # with the volume number of your disk. In my example I typed “select volume 6” because the drive with the label of “JOEL” is Volume 6.
Step 5
Type “list disk”. Verify that the Size of the disk marked with the asterisk matches your flash drive! My flash drive is 2 GB (approximately 2,000 MB) which is close enough to 1,959 MB. The size measurement will rarely match exactly to what the disk says it’s capacity is. I also have a 2 GB SD card connected. If I was not sure I had the correct disk I would have removed the SD card and started at Step 1 so I don’t accidentally erase data from the SD card.
Step 6
WARNING: This will “erase” all data from the selected disk! If you selected the wrong disk in Step 4 then you might erase data that you want to keep.
Type “clean”.
Step 7
Type “create partition primary”. This will create an unformatted partition to fill the disk.
Step 8
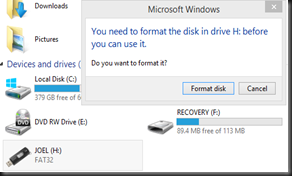
Type “assign”. This will give the give the drive a letter so it will appear in Explorer. At this point you may see the dialog box shown in Step 9.
Step 9
You can close DiskPart. If you do not see the dialog box saying you need for format the disk, then go back to Explorer and try to navigate to the flash drive. It will ask you if you want to format the disk. Click “Format disk”.
Step 10
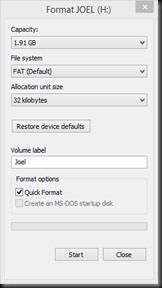
You can leave the settings at their defaults, if you would like, or change them if you know what the settings are. The Volume label is the “name” of your flash drive. Click “Start”. On the warning that appears, click OK.
Conclusion
If you didn’t encounter any error messages then congratulations, your drive has been cleaned!


